How To Create Water Effect

In this tutorial I will show you how to create cool water typography effect in Photoshop playing with stock photos, blend modes and filters. We will also use some water splash brushes and smooth gradients to give a splish-splash feel to our design.
For this tutorial I have downloaded a few things; water splash brushes from Brusheezy.com, stock photos and one font.
The water splash brushes can be found here: Brusheezy Water Brushes
For the stock photos I went in search of water splashes in glasses and water splashes in general, a good source was istock.com for cheap stock photo. Lastly the font was sourced from dafont.com it is called Val: Val Font
Step 1:
First off start a new document 1920×1200 pixels.
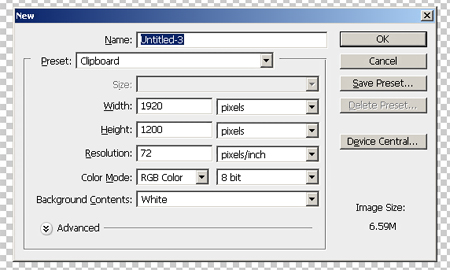
Then Fill the background with black using the paint bucket tool (G).
Step 2:
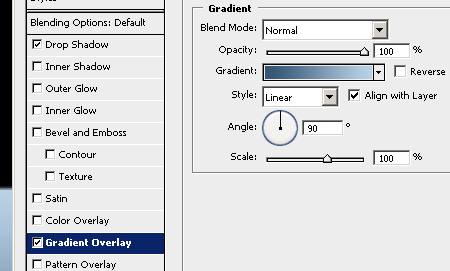
Using the Rectangle Tool (U), on Shape Layer option (this option is the top left-hand icons, the first one is Shape Layer) draw out a rectangle to fill the entire bottom half of the screen. When this layer is created double click it to bring up the Layer Styles, then select Gradient Overlay option and select the handles of the gradient and change to a light grade of navy to a light blue, here I have used #325372 (light navy) – # b9d2e6 (light blue).
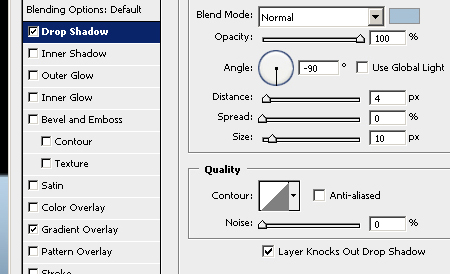
Then add a Drop Shadow of # a8c1d5, Opacity 100%, Angle -4, Distance 4px, Spread 0, and Size 10px.
Step 3:
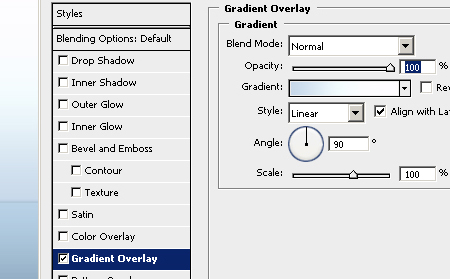
Again using the Rectangle Tool (U), on Shape Layer option (this option is the top left-hand icons, the first one is Shape Layer) draw out a rectangle to fill the entire top half of the screen. When this layer is created double click the layer in the layers palette to bring up the Layer Styles, then select Gradient Overlay option and select the handles of the gradient and change to a light blue to an even lighter blue then white, here I have used # c7d8ea (light blue) – # f4fcfe (light blue) – # ffffff (white).
Step 4:
Next using the Text Tool (T), type out a word you want to manipulate, here I am just going to go with 'water'! I am using the font Val because it resembles a sort of glass tumbler feel and it will also be easy to add the great splashes to.
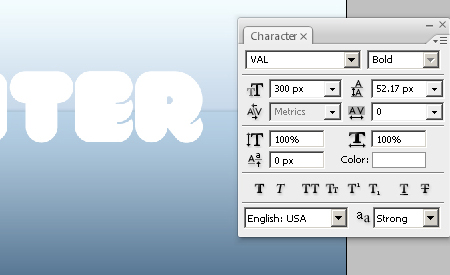
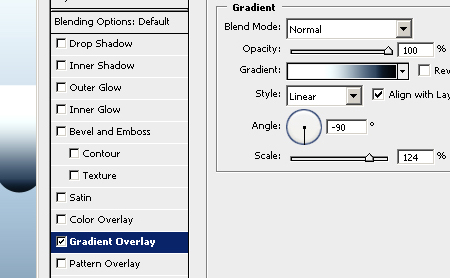
Here I will add a Gradient Overlay, so double click the text layer in your layers palette and select Gradient Overlay. Here I have added a gradient of black to dark navy to light blue to white; #000000 (black) – # 31475f (Dark navy) – # f0fafc (light blue) – #ffffff (white).
Step 5:
Next step is to make the text more of a 'tumbler type' feel, so here we will look at making a specialized gradient layer and then using some layer effects to make the layers stand out.
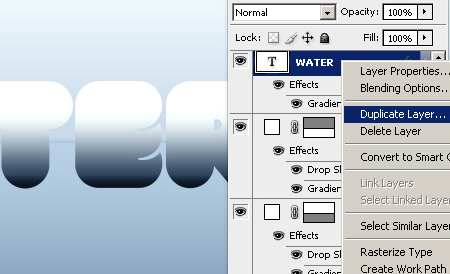
So duplicate the text layer, this can be done by right clicking the Layer and selecting Duplicate Layer.
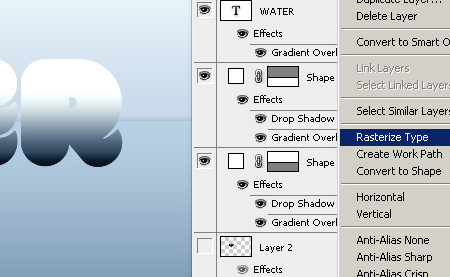
Then we want to Rasterize the text, this is so we can create some effects for on the layer, adding effects or different gradients.
Then clear the Layer Styles so that our effects will show through when we change the text layer, this can be done by right clicking and then selecting Clear Layer Style
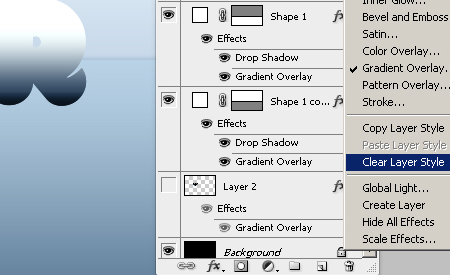
Lastly we need to select the text, not the Layer but the actual outline of the Rasterized text, this is done by right clicking and selecting Select Pixels.
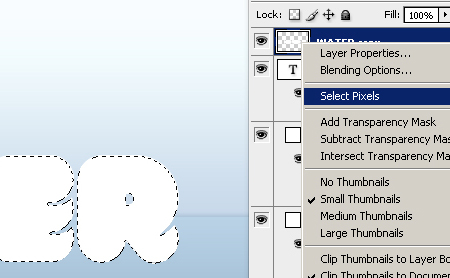
With the layer selected use the Gradient Tool (G) with your water gradient chosen, and the Radial gradient option selected (this is in the top middle section of the menu bar).
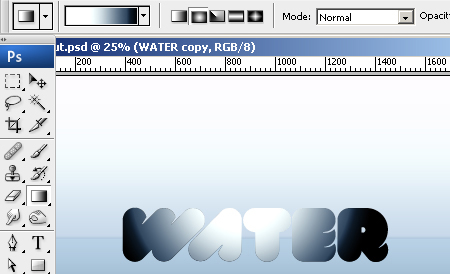
You should be able to make a nice radial gradient of white going out to the darker colors along the edges.
Next we will be manipulating the layers to have a glass like feel.
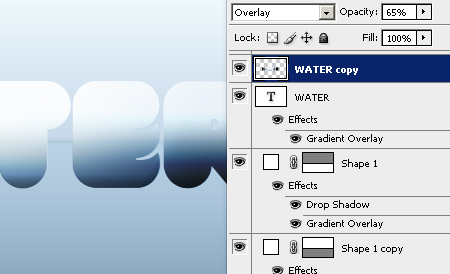
Now select the Layer you have just manipulated and in the Layers palette select Overlay as the Layer Blend Mode.
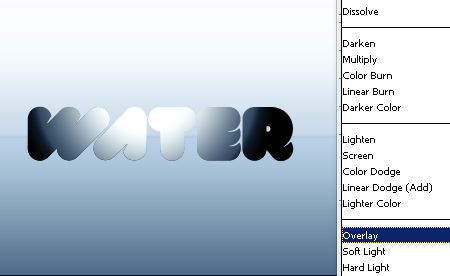
Now select the original Text Layer and change its Layer effect option to Color Burn. This should give an overall nice blend of both top and bottom layer.
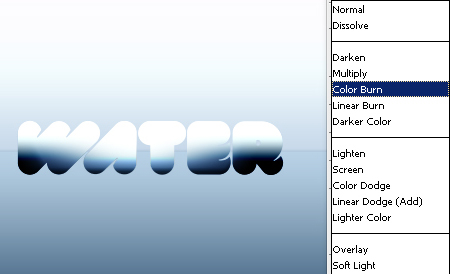
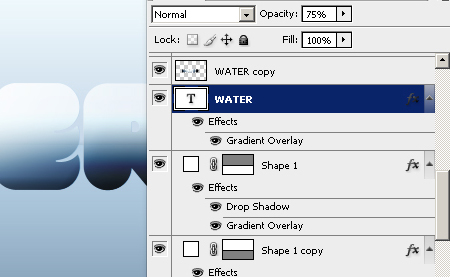
The last step for the text layers is the Opacity effect. Here select the first text layer and change this to 75% opacity, this can be found in the Layers Palette in the top right corner and the same with the other text layer but change this one to 65%.
Step 6:
So for the water splashes effect gather all your water splash imagery together and let's start adding the splashes in!
So here is a selection of my stock imagery I will be using.
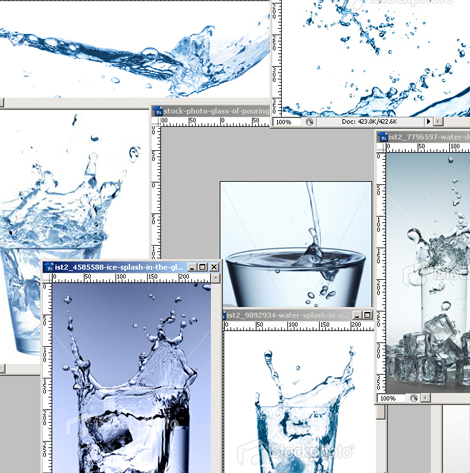
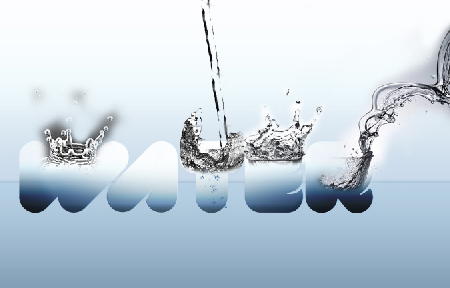
In this step all I have done is cut out the bits of splashes I required and with the Eraser Tool (E) and, using a soft edged brush, erased their background out.
Note that I have made all my splash layers black. This can be done by Desaturating the layer, you can do this by using the Hue/Saturation setting (Ctrl+U or Command+Ctrl+U) Image > Adjustments > Hue/Saturation. Then sliding the Saturation bar all the way to the left, this will drain all the color out of the layer. If this makes the layer have a washed out look just adjust the Brightness/ Contrast, this is also in Image > Adjustments > Brightness/ Contrast.
Step 7:
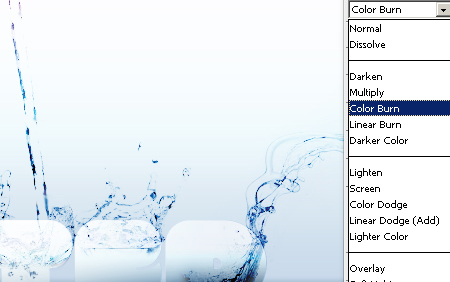
Next make all the splash layers Blend Modes into Color Burn, this will give it a crisp, clear look of water!
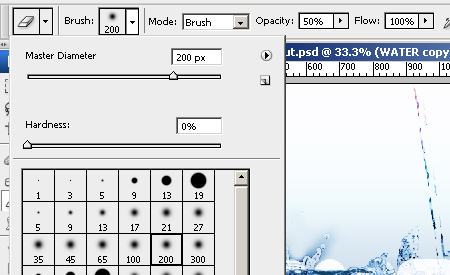
Now I want the font to blend much more with the splashes and so I will erase out the areas where the splashes join so it looks much more fluid. Use the Erase Tool (E) set to a big soft brush for around 200px and 50% opacity. Then erase the areas of the font that are overlapping with the splashes.
Step 8:
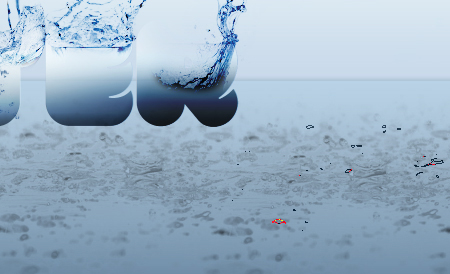
Time to use those cool Brushezzy water brushes we downloaded earlier.
Here I just picked out some droplets that will go nicely on as ground-cover. Set the brush color to a dark grey and place them on. Then I changed the Layer Mode type to Overlay to create a nice blend with the background gradient layer.
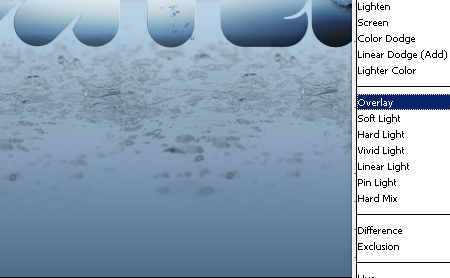
Step 9:
Now to give the image a color lift I'll add an overlay gradient layer. To do this create a new layer on top of all the other layers, then use the gradient fill tool (G). This is the same as the Bucket tool, so if you can't see it, just press down on the icon in your tool bar and it will reveal the Gradient Tool. Now select a nice blue gradient in the options in the top left (if there are no options just click on the current gradient and it will reveal the Gradient Editor for you to select your colors).
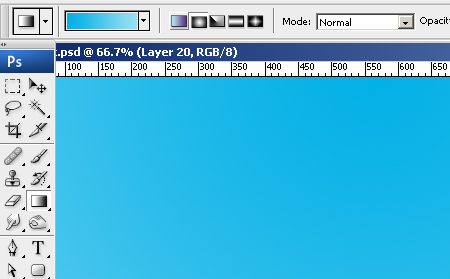
Lastly, let's make this layer blend in nicely; here I have changed the Layer mode to Soft Light.
Final Result:
Here is the final result; a water effect typography. Now you don't have to use as many splashes as I have, as I have added a lot of 'splash effects' to give you the idea of how they can be incorporated. It is a nice touch to have one or two but overall this is a fun easy tutorial to do that will give you a cool water effect.
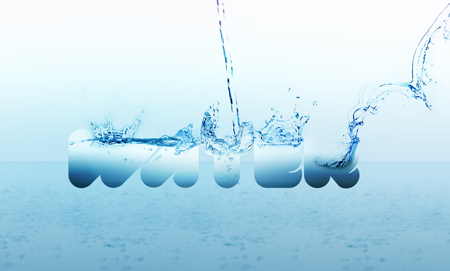

How To Create Water Effect
Source: https://www.designer-daily.com/how-to-create-cool-water-effect-typography-6576
Posted by: cliftonhowles1979.blogspot.com

0 Response to "How To Create Water Effect"
Post a Comment